 |
|
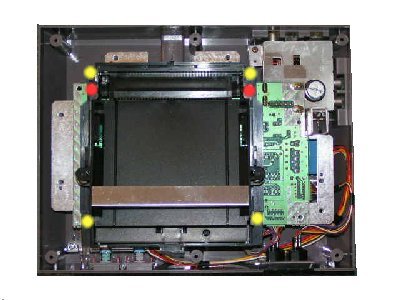 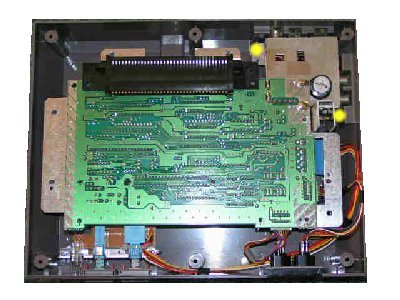 Step 2: Now, remove the 6 screws that attach the black cartridge holder in place to the mother board. Please take note that 2 of these screws will be a different color. The different screws are marked in red on the image for easy reference. The other 4 are yellow. The screws marked in red in the image need to be replaced in the same place upon re-assembly of the unit. Please take note of a special plastic clip that is on the bottom cartridge holder. When you re-install the cartridge holder make sure the clip goes under the board or it will not fit back together correctly. After the cartridge holder is removed you will need to remove the 2 screws that mount the board to the console. The 2 mounting screws are marked in yellow in the second image above. Next Page: |
|
| Home |
About Us |
Products |
Services |
Contact |
|